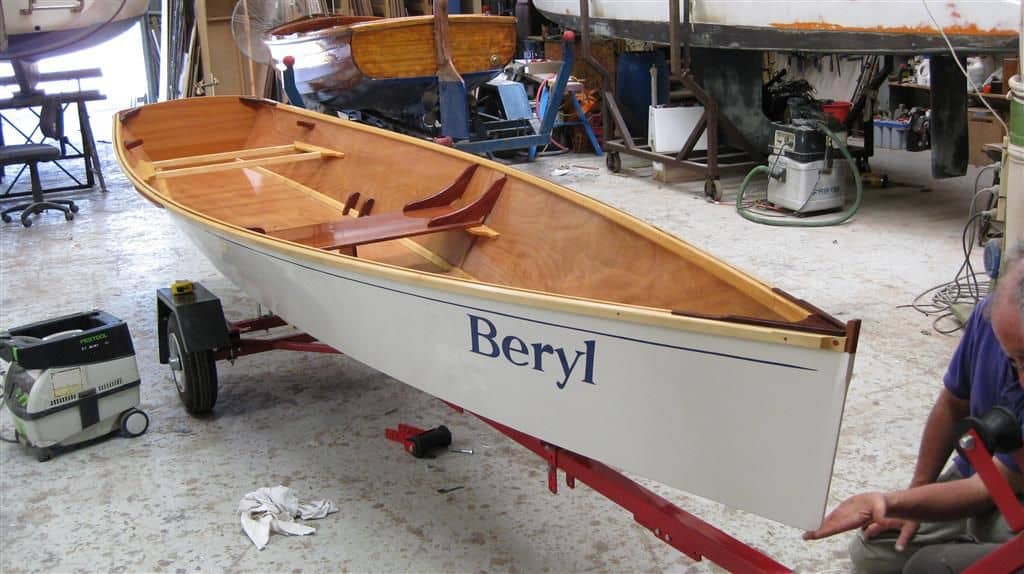
DIY Wooden Rowboat: How to Build a Boat for Leisure and Sport
Building a wooden rowboat is a rewarding project that allows you to craft a timeless vessel for leisure and sport. This comprehensive guide will provide you with step-by-step instructions, essential tools, materials, and valuable tips to guide you through the process. Whether you're a seasoned woodworker or a beginner, this guide aims to empower you with the knowledge and confidence to construct your own beautiful and functional rowboat.
Planning and Design
Before embarking on the construction process, careful planning and design are crucial. Here's a roadmap to guide you:
1. Determine Your Needs and Requirements
- Size and Capacity: Consider the number of people you want to accommodate, the weight capacity required, and the intended water conditions.
- Length and Beam: These dimensions will influence the boat's stability, speed, and maneuverability.
- Draft: The depth of the hull below the waterline determines the boat's suitability for shallow waters.
- Type of Rowing: Decide whether you prefer oars, sculls, or a combination.
2. Select a Rowboat Design
Numerous rowboat designs are available online, in books, and from boat plans suppliers. Consider these factors:
- Simplicity: Choose a design that aligns with your woodworking skills and available tools.
- Performance: Research designs that cater to your desired speed, stability, and maneuverability.
- Availability of Plans: Ensure that detailed construction plans are accessible for the chosen design.
3. Gather Materials and Tools
Once you have selected a design, compile the necessary materials and tools. This list is a starting point, and specific requirements may vary based on your chosen design:
Materials
- Wood: Marine-grade plywood, cedar, oak, mahogany, or other durable, rot-resistant wood.
- Epoxy Resin: For bonding and sealing wood.
- Fiberglass Cloth: For added strength and water resistance.
- Fasteners: Marine-grade screws, bolts, and rivets.
- Paint: Marine-grade paint or varnish for protection and aesthetics.
- Hardware: Rowlocks, oarlocks, seats, cleats, and other accessories.
Tools
- Saw: Table saw, circular saw, or hand saw for cutting wood.
- Router: For shaping, smoothing, and creating grooves.
- Sandpaper: Various grits for smoothing surfaces.
- Clamps: For holding wood pieces together during assembly.
- Drill: For drilling pilot holes and attaching fasteners.
- Tape Measure and Level: For accurate measurement and alignment.
Construction Process
Following a detailed rowboat design, the construction process typically involves these steps:
1. Building the Frame
- Cut and Shape: Using plans as your guide, cut and shape the wooden components for the boat's frame, including the stem, keel, and ribs.
- Join Components: Use epoxy resin, screws, or bolts to securely join the frame components.
- Fairing: Smooth out any irregularities or transitions in the frame for a sleek and hydrodynamic hull.
2. Installing the Planking
- Cut Planks: Cut planks to the desired size and shape, ensuring they fit snugly against the frame.
- Attach Planks: Fasten planks to the frame using epoxy, screws, or rivets.
- Fairing and Shaping: Carefully shape the planks to create the desired hull curvature.
3. Adding Strengthening and Water Resistance
- Epoxy Coating: Apply epoxy resin to all surfaces to seal and protect the wood.
- Fiberglass Layering: Apply layers of fiberglass cloth over the epoxy to provide added strength and water resistance.
- Finishing and Sanding: Once the epoxy and fiberglass have cured, smooth out any irregularities and sand the hull to a fine finish.
4. Installing Hardware and Features
- Rowlocks and Oarlocks: Install rowlocks or oarlocks, ensuring proper placement and alignment.
- Seats: Construct and install seats for comfortable rowing.
- Cleats: Secure cleats for mooring and docking.
- Other Accessories: Add any desired accessories, such as a rudder, oars, or a storage compartment.
5. Painting or Varnishing
- Preparation: Clean and sand the hull to prepare it for painting or varnishing.
- Application: Apply marine-grade paint or varnish in thin, even coats, allowing ample drying time between coats.
- Finishing Touches: Consider adding decorative accents or personal touches to enhance the boat's aesthetics.
Tips and Considerations
Here are some valuable tips and considerations to ensure a successful and enjoyable boat-building experience:
- Patience and Precision: Boat building requires patience, attention to detail, and meticulous craftsmanship.
- Work in a Well-Ventilated Area: Epoxy resins and other materials can release fumes. Ensure adequate ventilation to prevent health risks.
- Use Quality Materials: Invest in high-quality marine-grade materials for durability and longevity.
- Seek Guidance: Don't hesitate to consult boatbuilding books, websites, or experienced boat builders for guidance and support.
- Start Small: If you're a beginner, consider starting with a smaller boat to gain experience and refine your skills.
- Enjoy the Process: Building a wooden rowboat is a rewarding journey that allows you to connect with traditional craftsmanship and create a lasting heirloom.
Conclusion
Building a wooden rowboat is a fulfilling endeavor that offers a unique sense of accomplishment and allows you to create a beautiful and functional watercraft. By following these steps and paying attention to the details, you can craft a rowboat that will provide years of enjoyment on the water. Remember to prioritize safety, use quality materials, and appreciate the craftsmanship involved in this timeless tradition. Happy boating!
0 comments:
Post a Comment
Note: Only a member of this blog may post a comment.